Mobile apps have been at the forefront of redefining the way organizations conduct businesses.
They’ve transformed from simply being a strategy to gain more customers to something beyond.
In fact, they’ve become a necessary element of a brand’s digital presence!
So, if you’ve got an app that is solving a particular problem and you’re all set to launch it to make an impact, here’s how you can do it.
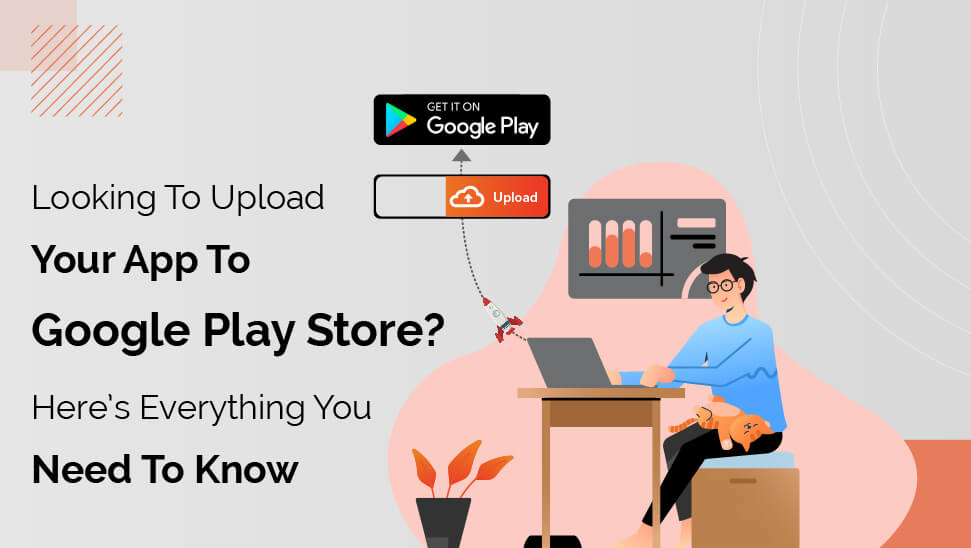
And by launching it, I mean you should upload it to the Google Play Store (If it is an Android app)!
And to do that, there’s this one gateway that you need to cross, which is the ‘Google Play Store.’
No one can doubt the dominance of the Google Play Store!
With over 2.56 million apps on the Google Play Store, it surpasses the App Store with a difference of six hundred thousand more apps than the App Store’s 1.96 million apps.
Therefore, it is implied that you have to upload your app to Google Play Store to drastically increase the chances of getting downloads, users-base, revenue, and whatnot!
Coming back to the point – let’s say that you’ve got an amazing app that you believe has the power to change the world.
And now you’re thinking of submitting it to Google Play Store.
At Tekrevol, we know a thing or two about uploading apps to the Google Play Store.
Therefore, here’s the complete process that you need to know to easily upload your app to Google Play Store.
Other than the uploading process, I’ve covered certain things that belong to the pre and post-app submission to the Play Store to help you ensure the success of your app.
So, here’s the whole daunting process made simpler and easier!
Let’s get started!

The Pre-App Submission Phase
Just think about it!
You’re about to tap into the world of Android that has millions and millions of apps.
For that, I need you to be prepared since Google Play Store is an enormous platform.
So, here’s a complete list of the components that you need to make sure to successfully upload your app to the Google Play Store.
1. Thoroughly Test Your Mobile App
It is useless to emphasize how critical this part can be for your mobile applications.
I mean, if you haven’t thoroughly tested your app for performance, features, and functionality before uploading it to the Google Play Store, then there’s still a significant risk of your app failing miserably.
So, to make sure that your app hits a home run in the digital world, you have to make sure that your app is feature-packed and it is performing up to the users’ expectations.
A pro tip here from my side would be for you to use emulators for testing your app’s performance.
These tools are specifically designed to help you make your app bullet-proof by testing them on real devices via simulation, enabling you to fix any issues, bugs, or discrepancies quickly.
2. Your App’s Size Matters
Nobody wants to download a 10Gb app regardless of how important it is. Users always tend to find an alternate option once they see that an app is super space-consuming.
Therefore, in the app’s world, size matters a lot!
And we’re not even done yet as there’s another roadblock that you’ll face while uploading your app to the Google Play Store.
Google only permits you to upload a file up to the size of 50Mb.
So, what can you do if your file is bigger than 50Mb? – well, here’s where the Android APK’s Expansion file enters into the competitive endeavor.
It is generally the process of breaking your app into chunks of up to 2Gb.
The chunks of data created through the file can be uploaded to the Cloud rendering the app of not more than 500Mb.
Moreover, once the user downloads the app, they can retrieve the data saved in the Google Cloud, or the app can automatically start retrieving the data.
3. Getting Your App Licensed
Although it is optional and not important to get your app licensed.
However, a little effort to get it trusted even more by the users won’t cost you a dime, especially if your app is paid in nature.
So, how can you get your app licensed?
You can do that by adding the End User License Agreement!
B adding this, you’ll gain control over your app, and this aspect may also help you in the future.
Here’s how you can add the agreement to your app:
- Include a bundle ID and Version number in your APK file.
- The APK file created should assign a specific number to your application which would help you release updates of your app.
- Bundle ID or App ID makes your application unique. Therefore, it should be included in the pre-submission phase of your Android app.
4. Integrating the Security Certificate
Although this may sound intimidating, getting a security certificate for your app isn’t that difficult.
The process involves creating a private key using Release Keystore.
This would be your certification signed as an APK, which you will need every time you upload your app to the Google Store.
Another name for this file is the JSK file which includes the credentials such as Keystore password.
5. Optimizing App Store Listing
Much like you need SEO for your website to gain more traffic, for an app, you need ASO, and one integral part of ASO is the app store listing.
This powerful and effective element helps your app to get more exposure and downloads.
Every app entrepreneur implements this process after uploading their app on the Play Store. However, I recommend you start doing this before submitting your app to get amazing results.
So, what exactly is an app listing?
App listing is basically the process of providing information to the users about the type of application you’ve got, what its features are, what it is capable of, and more.
The best practice while providing this information is to use high-quality screenshots of your app’s interface.
Furthermore, on Play Store, you can submit a minimum of 2 images and a maximum of 8 images!
Additionally, here are some other strategic implementations that you should consider while listing your app:
- Write a short and engaging title followed by a convincing short description.
- Upload high-quality screenshots of your application.
- Use a hi-resolution icon.
- Be clear about the type of app you have.
- Choose the category of your app.
- Give your users a URL to the privacy policy.
- Include the Email of the developer or the company.
6. Skim Through the App Submission Guidelines
Probably the best practice of them all is reading the guidelines that Google Play Store has for you when you’re uploading an app!
Actually, both the stores (App Store and Play Store) have their own specific guidelines. However, Google’s guidelines are super-flexible and in favor of developers as compared to App Store’s.
However, I’d say that although Google is super-cool with its guidelines, you still need to follow them carefully to avoid the unfortunate scenario where your app is kicked out of the biggest Android platform.
I don’t think anybody would want that, right?
Anyways, we’re done with the prerequisite phase of getting your app submitted to the Google Play Store.
It is time to hop on to the root of all of this conversation and start learning the process of uploading your app to the Google Play Store!

Uploading Your App to The Google Play Store
A Stepwise Breakdown of The Entire Process
After getting done with the pre-submission phase of the app, it is time to get started on uploading your app’s APK to the Play Store.
But make that you’re following the step-by-step approach to avoid any discrepancies in the long run!
Let’s get started!
1. Open Your Developer Dashboard

The first and the simplest step is to open or log in to your Google Play Store’s developer dashboard.
The submission of your app to the Google Play Store will begin from here!
Let me first give you a little insight into what the developer dashboard actually is?
The developer dashboard is more like a backend controlling center of the Google Play Store where you can control and manage the status of your app.
Let it be performance management or solutions to a specific problem of your app; you’ll get all of the information from the developer dashboard.
Additionally, to open an account here, you’ll be required to pay a one-time fee of $25, which is the Google Play Store’s cost of opening a developer’s account.
Once you’ve bought the account, you’ll have to enter some details, i.e., name, country, contact number, and more.
Click the submit button, and your account will be approved in 48 hours!
That’s it – the first step is complete!
2. Link Your Developer’s Account With Google Wallet Merchant Account

This step is especially for the apps that have in-app purchases.
Suppose your app belongs in the in-app purchasing category. In that case, you’ll need to interlink your developer’s account with Google Wallet Merchant Account!
However, the process is easy. Here’s how you can interlink both the accounts with each other:
- Sign in to your Google Console Account.
- Click on the ‘Reports’ followed by the ‘Financial Report’ option.
- Find the ‘Set up a merchant account now’
- Fill in the details after clicking the option.
- The merchant account will then automatically be interlinked to your Google Console account. As a result, you’ll be able to manage and examine sales.
3. Next Stop: The ‘Create Application’ Option

The create application option is, as the name suggests, another step towards going digital by uploading your app to the Play Store.
Here’s the process that you need to follow once you’re on this step:
- Go to the ‘All Application’ tab present in the menu.
- Find the ‘Create Application’ option and click it.
- A drop-down menu will appear. From this menu, select the default language of this application.
- Enter the title of your application (you can change it later).
- Click on the ‘Create’
4. App Store Listing
This step is where you’ll thank me for getting you prepared in the pre-app submission phase of this blog.
The preparations you made before uploading your app to the Google Play Store are about to come in handy.
That’s because, in this step, you’re required to fill in the complete information related to your app.
I’ve attached a screenshot below in which I’ve mentioned all the information that you’ll be filling opting for app listing.
My recommendation here would be to conduct a little research on which keywords or specific terms you can use while inputting details of your app in this step.
Appropriate keywords and highly relevant app descriptions while drastically increase your chances of giving your app more exposure in the searches in the Google Play Store.
Other than that, there’s a specific process that ensures maximum exposure and appearance of your app in the searches.
It’s called ASO or App Store Optimization, and we’ve got a great article on it here.
5. Upload App APK Or Bundle To Google Play Store

This is the part where you’re required to completely upload your app either in the APK form or bundle to the Play Store.
And here’s a breakdown of the process that you’ll be following here:
- Go to the ‘Release Management’
- From this section, click on the ‘App Release’ button in the menu.
- After clicking, choose any one type of release from the following four options:
- Internal test.
- Close test.
- Production release.
- Open test.
After you’ve decided which type of release you want, click the ‘Create Release’ button.
Once you’ve clicked, you’ll be redirected from the new release to the production page.
Here you’ll find another option where the Play Store will ask you whether you want to opt for Google Play App Signing or not.
You can choose the ‘OPT-OUT’ option if you’re choosing the latter.
Done? Now click on the ‘Browse Files’ option.
Follow the instructions to ensure a swift and informed app APK or bundle uploading process while simultaneously naming and describing your release.
Besides, even if you think you’ve made a mistake in entering the information, you can always opt for the ‘Review’ option to ensure that everything is accurate before saving it.
Then once you’re sure, hit the ‘Save’ button.
6. The Content Rating Part

This is yet another integral part of submitting your app to the Google Play Store.
This step involves getting your app rated because an unrated app is known to be removed from the Google Play Store.
So, for Content Rating, you can follow the process mentioned below:
- Go to the menu on the left-hand side of the screen and select ‘Content Rating.’
- Click ‘Continue’ to move on with the process.
- Enter your Email in the field that appears once you’ve tapped ‘Continue’ and then click ‘Confirm.’
- You may receive a questionnaire regarding your app’s rating that you’ll be required to fill.
- After filling in the fields, click ‘Save Questionnaire’ and then choose ‘Calculate Rating’ to view your rating on the Google Play Store.
- Once you’re done with the above process, simply click ‘Apply’ to finalize your app’s Content Rating.
7. Finalize Your Pricing & App’s Availability

Unfortunately, Google is pretty clear about your app’s availability regarding the countries in which you’re targeting your app.
You’re advised to publish your app in specific countries, not all regions, or more clearly worldwide.
If you’re an app entrepreneur, I’m pretty sure that you already know which region would your app serve and why.
However, if you’re a marketer who’s assigned the task to strategically place the app where it belongs.
The best approach would be to conduct comprehensive market research to get your app placed in front of the users who are actually looking for that specific app.
The second most critical step is to assign a price to your app.
And if you’re thinking that you’re launching your app for free at the moment and in the future (after having a significant user-base), you’ll be converting it to paid one – let me tell you that this won’t work!
Google doesn’t allow you to change the pricing model of your app once it is published to the Google Play Store.
So, make sure that any decision you make at the moment is permanent.
Wondering how you can do all this? Well, I won’t skip to the final step before telling you the process.
So, here it is:
- Go to the ‘Pricing and Distribution’ tab in the menu.
- From here, you can make the choice of whether your app will be Free or Paid.
- After that, you’ll be able to select the countries in which your app will be released.
- You can also add a suitable age bracket for which your application is built. If it is for children under the age of ‘13’, select If not, then simply select no.
8. Congrats, Your App Is Published!
Phew!
After going through the entire process carefully and confirming everything before submission of your app to the Google Play Store – this is the last step that you’ll take to get your app uploaded to the Google Play Store.
Here’s the final process of ensuring that your app has been successfully uploaded to the Play Store:
- Go back to the ‘App Releases’ tab.
- Find and select the ‘Manage Production’ followed by ‘Edit Release.’
- Tap on the ‘Review’ option and choose ‘Start Rollout To Production.’
- In the end, you’ll see the ‘Confirm’ option, hit it, and there we go!
You’ve successfully published your app to the Play Store for free.
All you can do now is wait for your app to get approved by the Google Play Store, which generally takes about 2 hours.
However, I went through the latest privacy policy of Google, and I can predict that this time it won’t take just 2 hours to get your app approved.
They’ve revamped several sections of their policy, and now it may take several hours, maybe even days, to get your app approved and published to the Google Play Store.
This is the main reason why I believe that you should select a robust and quality-focused app development company to create a flawless and compatible app for your brand that instantly gets approved.
In the meantime, you can just hold on to your excitement until your app gets approved and learn a few other essential things in the post-submission phase of your app!
Here we go!

Getting Your App Featured On The Google Play Store
Let’s assume your app has been approved by Google Play Store.
So, what’s now?
What more can you do to ensure your app’s success, popularity, and downloads?
After the successful upload of your app to the Google Play Store, what you can do is you can work to get your app featured on the Play Store.
You can opt for strengthening your user interactions, refine your UI and UX, optimize your app for Android and localize your app to get it featured on the Play Store.
Thinking of the benefits of getting this done?
Your app will witness a drastic increase in its engagement and downloads once it gets features on the Play Store.

Post-Submission Phase Of Your App On The Google Play Store
Now that I’ve made the process of publishing your app to the Google Play Store simpler let’s get on a crusade to give your global app exposure.
But first, why emphasize so much on uploading an app to Google Play Store?
Why don’t we follow the simple process of signing into the developer dashboard, entering the necessary information, and publishing the app!
I mean, there’s nothing at stake here, right?
Wrong!
There’s a lot at stake here, and surprisingly, there’s a well-informed process that an app development company follows to publish their client’s app.
This strategic process is there because of a little something called A.S.O or app store optimization.
Much like SEO plays a critical role in getting your website to rank higher in the SERPs for a specific set of keywords, A.S.O is imperative for ensuring high rankings in the Google Play Store.
And by ensuring high ranking, you get more traffic to your app, which literally results in more downloads.
Here are a few tips on how you can do that:
1. Implement ASO
App store optimization or ASO is the process of optimizing your application to attain a higher ranking in the play store.
Like SEO, ASO also involves keywords, listing, and similar practices that bring in more attention and exposure for a specific set of keywords leading to more downloads and engagement.
Additionally, opting for a strategic A.S.O. strategy is an essential post-launch aspect since it helps you with the following aspects:
- Enhances your brand exposure
- Increases audience engagement
- Provides advanced diversification of marketing channels
- Helps create positive reviews and ratings about your app
However, this is all subject to the accuracy and strategic implementation of the A.S.O. metrics and strategies to ensure profitable results.
2. Maintaining & Updating Your App
The journey doesn’t halt once you’ve published your app to the app store. Instead, it is just the beginning!
After successful publishing of your app, you need to maintain it by releasing frequent updates.
All the great app that you use daily, like Facebook or Instagram, all release updates.
Additionally, the best way to release updates is after receiving user feedback.
In this way, you can analyze the data received and determine the issues or bugs that your app has harming your user experience.
Fix such issues and release an update to ensure that your app is performing efficiently.
3. Promote Through Press-Releases
If you want your app to reach a global audience, attain a wide user base, and get listed on top in a particular niche?
Then promoting your app through a press release is the best idea and a great marketing strategy!
When you send a press release regarding your app, publication companies cover your app’s release and inform their audience about your app’s USPs or innovative aspects.
Through this approach, your app comes into the limelight resulting in more downloads, app awareness, and more.
4. Promoting Your App Social Media
If your app is gasoline, then social media is fire!
Today’s social media has the power to skyrocket your app’s growth and increase your revenue by several folds.
According to research, 3.69 billion people use social media. This stat alone is enough to help you understand the importance of social media for your app.
So, which platform should you choose to market your app?
You can leverage Facebook, Instagram, Twitter, Linked In, and many more to market your app.
In fact, Facebook’s paid marketing functionality also gives you an option to promote your app.
Therefore, eventually, you can optimize an entire campaign to get more traffic and downloads to your app.

 3366 Views
 August 4, 2021